
💗Kid's Valentine Crafts That Fill Your Home with Love (And Keep Little Hands Busy!)
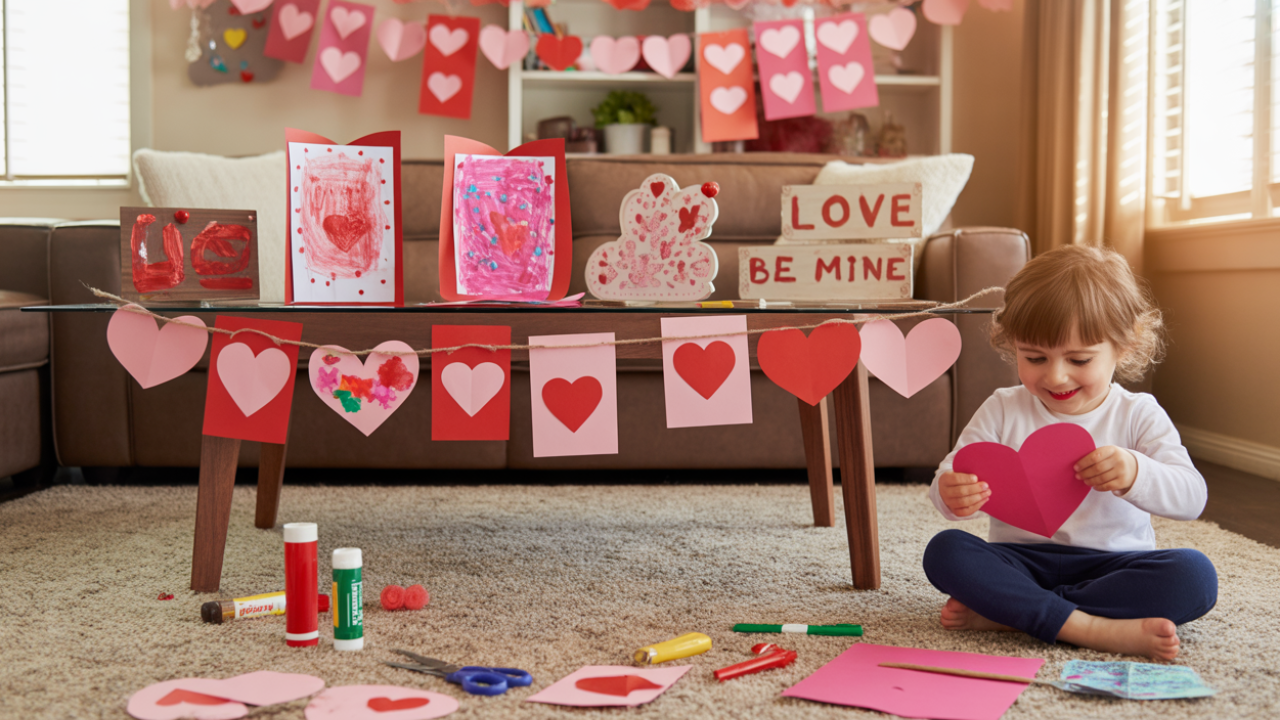
I loved decorating the walls with art for every holiday to be more festive and fun. There's something magical about walking into a room and seeing handmade hearts, colorful creations, and glittery masterpieces celebrating love and friendship. Having worked with kindergartners, I know kids love giving their loved ones craft gifts. The pride radiating from a five-year-old handing you something they made themselves is absolutely priceless.
Valentine's Day offers the perfect opportunity for kids to express creativity while learning about kindness, friendship, and showing appreciation for people they care about. These crafts transform ordinary afternoons into memory-making experiences that children will remember long after the construction paper fades. Plus, grandparents, aunts, uncles, and friends treasure receiving handmade gifts from little ones far more than anything store-bought.
The best children's crafts balance simplicity with impressive results. Kids need projects they can actually complete without constant adult intervention, yet the finished product should look good enough that they feel genuinely proud. The crafts I'm sharing today hit that sweet spot—easy enough for preschoolers with supervision, fun enough that older elementary kids won't feel bored, and adorable enough that adults will genuinely want to display them.
Paper Plate Love Bug Craft: Adorable and Easy 💗
These cheerful love bugs turn simple paper plates into the cutest Valentine decorations. Kids adore the googly eyes and pipe cleaner antennae, while parents appreciate the minimal mess and low cost. Each bug develops unique personality based on decoration choices, making every creation one-of-a-kind.
Step 1: Gather supplies for each child. You'll need one paper plate per bug, red or pink paint (tempera or acrylic works great), paintbrushes, googly eyes in various sizes, pipe cleaners in red and pink, construction paper scraps, glue sticks, scissors, and markers. Set up your workspace with newspaper or a plastic tablecloth to catch paint drips.
Step 2: Have kids paint the entire back of their paper plate with red or pink paint. The back of the plate provides a smoother painting surface than the ridged front. Encourage full coverage but don't stress perfection—patchy paint adds character. Let plates dry completely, which takes about 30-45 minutes depending on paint thickness. Set up a drying station where plates won't stick to surfaces.
Step 3: While paint dries, prepare antennae by cutting pipe cleaners in half. Each bug needs two antenna pieces. Show kids how to curl one end of each pipe cleaner around a pencil to create spiral tips. Remove from pencil and gently stretch spirals slightly. These curled ends will become the adorable antenna balls.
Step 4: Once plates are dry, flip them over so the painted side faces up. Help younger children poke two small holes near the top edge of the plate, about two inches apart, using a pencil point or scissors tip (adult job for safety). Thread pipe cleaner antennae through holes from the front, then bend and twist the back ends to secure. The curled spiral tips should wave happily above the bug's head.
Step 5: Create the face by gluing on googly eyes. Kids can use matching sizes for traditional looks or mismatched sizes for silly personalities. Two eyes is standard, but four or six eyes create fun spider-bug hybrids. Position eyes in the upper-middle area of the plate, leaving room below for mouths and other features.
Step 6: Cut out hearts from construction paper scraps for spots, cheeks, or decorative elements. Kids can glue small hearts all over their bug's body like ladybug spots, add pink hearts to cheeks, or create heart-shaped wings. Provide pre-cut hearts for younger children and let older kids cut their own. Mix sizes and colors for visual interest.
Step 7: Use markers to draw smiling mouths, noses, or additional details. Black markers work well for mouths and eyelashes. Add arms and legs using markers or additional pipe cleaner pieces glued to the plate edges. Write the child's name and year on the back before displaying. Attach string or ribbon to the top for hanging, or glue a magnet strip to the back for fridge display.
Step 8: Display love bugs proudly! These look adorable clustered together on walls, hanging from doorways, or lined up along mantels. Kids feel so proud seeing their creations displayed, which encourages future artistic efforts.
Handprint Heart Keepsake: Treasure Memories Forever 💗
Handprint crafts capture how tiny those little hands once were, making them incredibly sentimental keepsakes. This Valentine version creates a heart shape using two handprints and becomes something parents and grandparents treasure forever. I've seen grandparents tear up receiving these.
Step 1: Assemble materials including cardstock or canvas board (8x10 or larger works well), washable paint in red or pink (tempera paint cleans up easiest), paint brushes or foam rollers, wet wipes or damp cloths for cleanup, markers, and optional embellishments like stickers or glitter glue. White or cream backgrounds make paint colors pop beautifully.
Step 2: Pour paint onto a paper plate or palette. Use foam rollers or paintbrushes to coat the child's entire palm and fingers with an even layer of paint. Don't glob it on too thick or handprints will blur, but cover thoroughly enough that prints transfer cleanly. Work quickly since paint dries fast on skin.
Step 3: Position the cardstock horizontally on your work surface. Guide the child to press their painted hand onto the left side of the paper with fingers pointing up and slightly angled toward the center. Press firmly and encourage them to hold still for three seconds without wiggling. Carefully lift straight up to avoid smearing. You've just created the left side of the heart.
Step 4: Quickly re-paint the same hand (or paint the other hand if you prefer). Press this handprint on the right side of the paper, creating a mirror image with fingertips angling inward to meet the first print. The thumb bases should meet at the bottom center, forming the heart's point, while fingers curve outward forming the top humps. Don't worry if it's not perfect—handprints always look adorable.
Step 5: Let handprints dry for 20-30 minutes. While waiting, clean up little hands thoroughly with wet wipes and soap. Kids can watch their creation dry, which builds anticipation. Once dry, use markers to add decorative elements. Draw heart outlines connecting the handprints if the shape needs definition.
Step 6: Personalize with the child's name, age, and date. Write "Handmade with love by [name], age [number], February 2026" beneath the handprint heart. This information becomes precious as years pass. Parents and grandparents love looking back at how small hands once were.
Step 7: Add final touches with stickers, glitter glue accents on fingertips, or small hearts decorating the background. Write a short message like "I love you THIS much!" or "You hold my heart." For gifts, back with colorful construction paper matting before framing.
Step 8: Frame or laminate for longevity. Inexpensive frames from dollar stores work perfectly, or laminate at office supply stores to preserve the artwork. These make exceptional gifts for grandparents, especially those who live far away and don't see grandchildren frequently. Consider making multiple copies by repeating the process on several cardstocks.
Conversation Heart Garland: Festive and Functional 💗
This adorable garland decorates any space with Valentine cheer while letting kids practice writing sweet messages. Stringing hearts together develops fine motor skills, and displaying the finished garland prominently validates children's efforts. Plus, it actually looks good enough that you'll want it up all February.
Step 1: Cut out heart shapes from construction paper in various Valentine colors—red, pink, purple, white, and even some light yellow or orange for variety. Each garland needs 10-15 hearts depending on desired length. Use a heart template to trace, or fold paper and cut half-heart shapes that unfold symmetrically. Mix sizes if desired, but keeping them relatively uniform (around 4-5 inches wide) looks most cohesive.
Step 2: Lay hearts out flat on your workspace. Kids should write short messages or words on each heart using markers or crayons. Classic options include "Be Mine," "Hug Me," "XOXO," "Cutie," "Sweet," "Love," "BFF," "You Rock," or family members' names. Encourage creative spelling and original messages. Younger children can draw pictures instead—hearts, flowers, smiley faces, or simple patterns.
Step 3: Decorate hearts with additional embellishments while they're still flat. Add stickers, stamp designs, glitter glue borders, or small drawings around the messages. Letting each heart look different adds charm rather than requiring uniformity. Some kids go minimalist with simple messages while others cover every inch with decorations—both approaches work beautifully.
Step 4: Punch holes at the top of each heart using a standard hole punch. Position holes centered and about half an inch from the top edge. Consistency in hole placement ensures hearts hang evenly when strung together. If you don't have a hole punch, carefully poke holes with a pencil point (adult supervision required).
Step 5: Cut a piece of yarn, string, or ribbon long enough to span your desired garland length plus extra for hanging loops at each end. Around 6-8 feet works well for most spaces. Choose colors that complement your hearts—white, pink, or red yarn blends nicely with Valentine themes.
Step 6: Thread hearts onto the string by guiding yarn through the punched holes. Space hearts evenly, leaving a few inches between each one so they have room to twist and display both sides. Kids can practice patterns, alternating colors, arranging by size, or organizing messages in specific order. This sequencing activity builds math and planning skills.
Step 7: Tie loops at both ends of the string for hanging. Test your garland by holding it up to ensure it drapes nicely and hearts hang at good angles. Adjust spacing if needed before final display. If hearts slide too much, add tiny dots of glue where string passes through holes to lock them in position.
Step 8: Hang your garland across doorways, along walls, above windows, or across fireplace mantels using pushpins, tape, or command hooks. The colorful hearts catch attention and spread Valentine joy throughout your home. Kids love pointing out which hearts they decorated and reading messages to visitors.
Heart-Shaped Strawberry Toast: Yummy and Easy Treat for Craft Making 💗
This adorable snack combines Valentine fun with actual nutrition, making it perfect for classroom parties, after-school treats, or special breakfast surprises. Kids can mostly make these independently, and the heart shapes transform ordinary toast into festive celebration food.
Start with bread slices, white, wheat, or even cinnamon raisin work beautifully. Use heart-shaped cookie cutters to cut shapes from bread before toasting, or toast first then cut. Cutting before toasting creates crisper edges while cutting after toasting is easier for younger children. Each method works fine.
Toast the bread hearts to desired darkness. Lighter toasting keeps bread softer, which some kids prefer, while darker toasting adds crunch and holds toppings better. Supervise toaster use or use toaster ovens where adults control temperature settings.
Spread cream cheese on cooled toast hearts. Plain cream cheese works, but strawberry cream cheese adds extra Valentine color and flavor. Softened cream cheese spreads easier—leave it out for 20 minutes before crafting. Give each child a plastic knife for safe spreading practice.
Top with fresh strawberries sliced into hearts. Slice strawberries lengthwise, then use a mini heart cutter to cut shapes, or simply cut a small "V" notch into the wide end of strawberry slices to create heart tops. Arrange strawberry hearts on the cream cheese like decorations.
Add final touches with other toppings. Sprinkle with colorful sprinkles, drizzle with honey, add mini chocolate chips, or arrange blueberries as accents. Kids love customizing their toast creations. Set up a topping bar where children can choose their own combinations.
Serve immediately while toast is still slightly warm and cream cheese soft. These make great snacks for Valentine parties because kids can make their own, the ingredients aren't too messy, and allergy accommodations are simple, swap cream cheese for sunflower butter or dairy-free alternatives, and replace strawberries with other fruits if needed.
Take photos of kids with their toast creations before eating. These festive snacks photograph beautifully and give kids pride in their edible art. The combination of crafting and eating makes this activity doubly engaging.
Common Crafting Mistakes and Smart Solutions 💗
Mistake: Providing projects too complicated for children's developmental level, leading to frustration and meltdowns. Kids shut down when crafts exceed their capabilities, and adults end up doing everything while children watch. Solution: Choose age-appropriate projects where kids complete most steps independently. For preschoolers, stick with painting, gluing, and decorating rather than precise cutting or detailed assembly. Have adults do prep work (cutting shapes, hole punching) beforehand so kids focus on creative fun parts.
Mistake: Expecting perfection and correcting every crooked line or messy edge. Constant correction kills creativity and makes kids feel their efforts aren't good enough. Solution: Embrace imperfection enthusiastically. Wobbly hearts and uneven paint strokes add charm to children's artwork. Focus praise on effort and creativity rather than technical execution. Display every creation proudly regardless of how it turned out.
Mistake: Using permanent or difficult-to-clean supplies without protecting surfaces and clothing. Permanent marker on furniture, paint ground into carpets, and ruined clothes create unnecessary stress. Solution: Cover work areas with newspaper, plastic tablecloths, or cardboard. Put kids in old oversized t-shirts or paint smocks. Choose washable paints, markers, and glues whenever possible. Keep wet wipes and paper towels within arm's reach.
Mistake: Running out of supplies mid-project when kids are engaged and excited. Nothing deflates enthusiasm faster than stopping halfway through because you're short on glue sticks or construction paper. Solution: Inventory supplies before starting and prepare extras. Kids use way more glue than expected, drop things on the floor, and make "mistakes" requiring fresh materials. Having backup supplies prevents disappointment and keeps creative momentum going.
Mistake: Setting unrealistic time expectations, either rushing kids or having them sit too long. Rushing creates sloppy work and tears, while overly long projects lose attention. Solution: Know realistic timing for each age group. Preschoolers focus well for 15-20 minutes, early elementary for 30-40 minutes. Break longer projects into sessions with breaks between. Better to stop while kids are still engaged than push until everyone's miserable.
Mistake: Displaying all art for one week then throwing everything away where kids can see. Children notice when their creations go in the trash and feel their work wasn't valued. Solution: Rotate displays throughout February instead of tossing everything at once. Take photos before discarding physical items to preserve digitally. Create special memory boxes where kids choose their favorite pieces to keep long-term. Some artwork can be mailed to relatives instead of thrown away.
Mistake: Making Valentine crafts all about romantic love, leaving out kids who don't have traditional family structures. Not every child has both parents, and Valentine's focus on couples can feel excluding. Solution: Frame Valentine's Day as celebrating all kinds of love—friendship, family, pets, teachers, neighbors. Make friendship-focused crafts kids can share with classmates. Talk about showing kindness and appreciation to everyone who makes our lives better.
Mistake: Comparing children's work or setting up competitive situations. Comments like "Look how neat Sarah's is!" make other kids feel inadequate. Solution: Appreciate each child's unique creation individually. Point out specific things you love about each person's work—color choices, creative ideas, careful effort. Avoid comparisons completely. Every child's art deserves celebration on its own merits.
Wrapping Up Your Valentine Crafting with Joy 💗
Valentine crafts create more than decorations, they build memories, confidence, and skills. Every time children complete projects independently, they develop problem-solving abilities, patience, and pride in their accomplishments. The messy kitchen table, glitter everywhere, and paint-stained clothes are temporary. The memories of creating together last forever.
These crafts teach children that handmade gifts carry special meaning. In our world of instant everything, taking time to create something shows love in tangible ways. Kids learn that effort matters, that imperfect creations made with love outshine perfect store-bought items, and that giving feels as wonderful as receiving.
Start simple if crafting with kids feels overwhelming. One project on a Saturday afternoon succeeds beautifully. You don't need elaborate craft rooms or expensive supplies—construction paper, glue, and imagination create magic. Follow your children's interests and energy levels rather than forcing activities they're not enjoying.
Take photos throughout the process, not just of finished products. Pictures of paint-covered hands, concentrated faces, and proud smiles become treasured documentation of childhood. Years from now, you'll treasure seeing how small they were and remembering these creative afternoons together.
Invite other families to join crafting sessions. Kids feed off each other's creativity and enthusiasm, and adults can share supervision duties. Valentine crafting parties build community while keeping kids engaged and happy. Plus, more hands make cleanup faster!
Most importantly, enjoy the process more than the outcome. Laugh at paint mishaps, celebrate every creation enthusiastically, and focus on time spent together rather than Pinterest-perfect results. Your enjoyment teaches children that creativity is joyful, mistakes are okay, and spending time together matters most.
May your Valentine's Day overflow with handmade hearts, glitter, and the sound of children's laughter. May your walls display colorful masterpieces that make you smile every time you pass. Here's to celebrating love, creativity, and the beautiful mess of childhood.
Happy crafting, and the happiest Valentine's Day to you and your little artists!
Get Profitable Online!
Clearly Entrepreneurially Elevated
Learn how to become profitable through blogs with affiliate links, videos with ads, memberships, coaching, and events.
All women deserve higher levels of love, health, wealth, and abundance. Follow your passions.
Freebies are Fun!
Join our amazing newsletter with fun tips, & receive the following feel good freebies:
- Opt In For Today's Freebie: "The #1 Reason Why People Purchase"
The number one reason people buy isn’t typically logic— This freebie reveals how to communicate your offers in a way that helps connect the dots. Move authentically towards more sales! Fulfill your mission.


